
Anyone who has shot breakfast for a client knows the problem: you want that quiet, golden first-light feeling, but you need it at 3 pm, on a grey day, and repeatable for every set-up that follows.
So photographer and educator Karl Taylor of Visual Education built one breakfast scene – two almond croissants, an espresso, a ramekin of jam, a spoon and a folded newspaper – and lit it three different ways. Not a single prop moves between setups. The only variable is the light.
The result is a neat lesson in why “soft” and “natural” are not the same thing. And the setup Karl would actually use? It is not the one most of us would reach for first.
The brief: control the sunrise
The aim was to recreate soft morning light falling into a room, while keeping complete control of the scene. On food, Karl always prefers backlighting: light from behind brings out texture, gloss and the edges of glass. Every setup below starts from that principle.
Setup 1: Pure soft light – the Octabox 150 behind the set
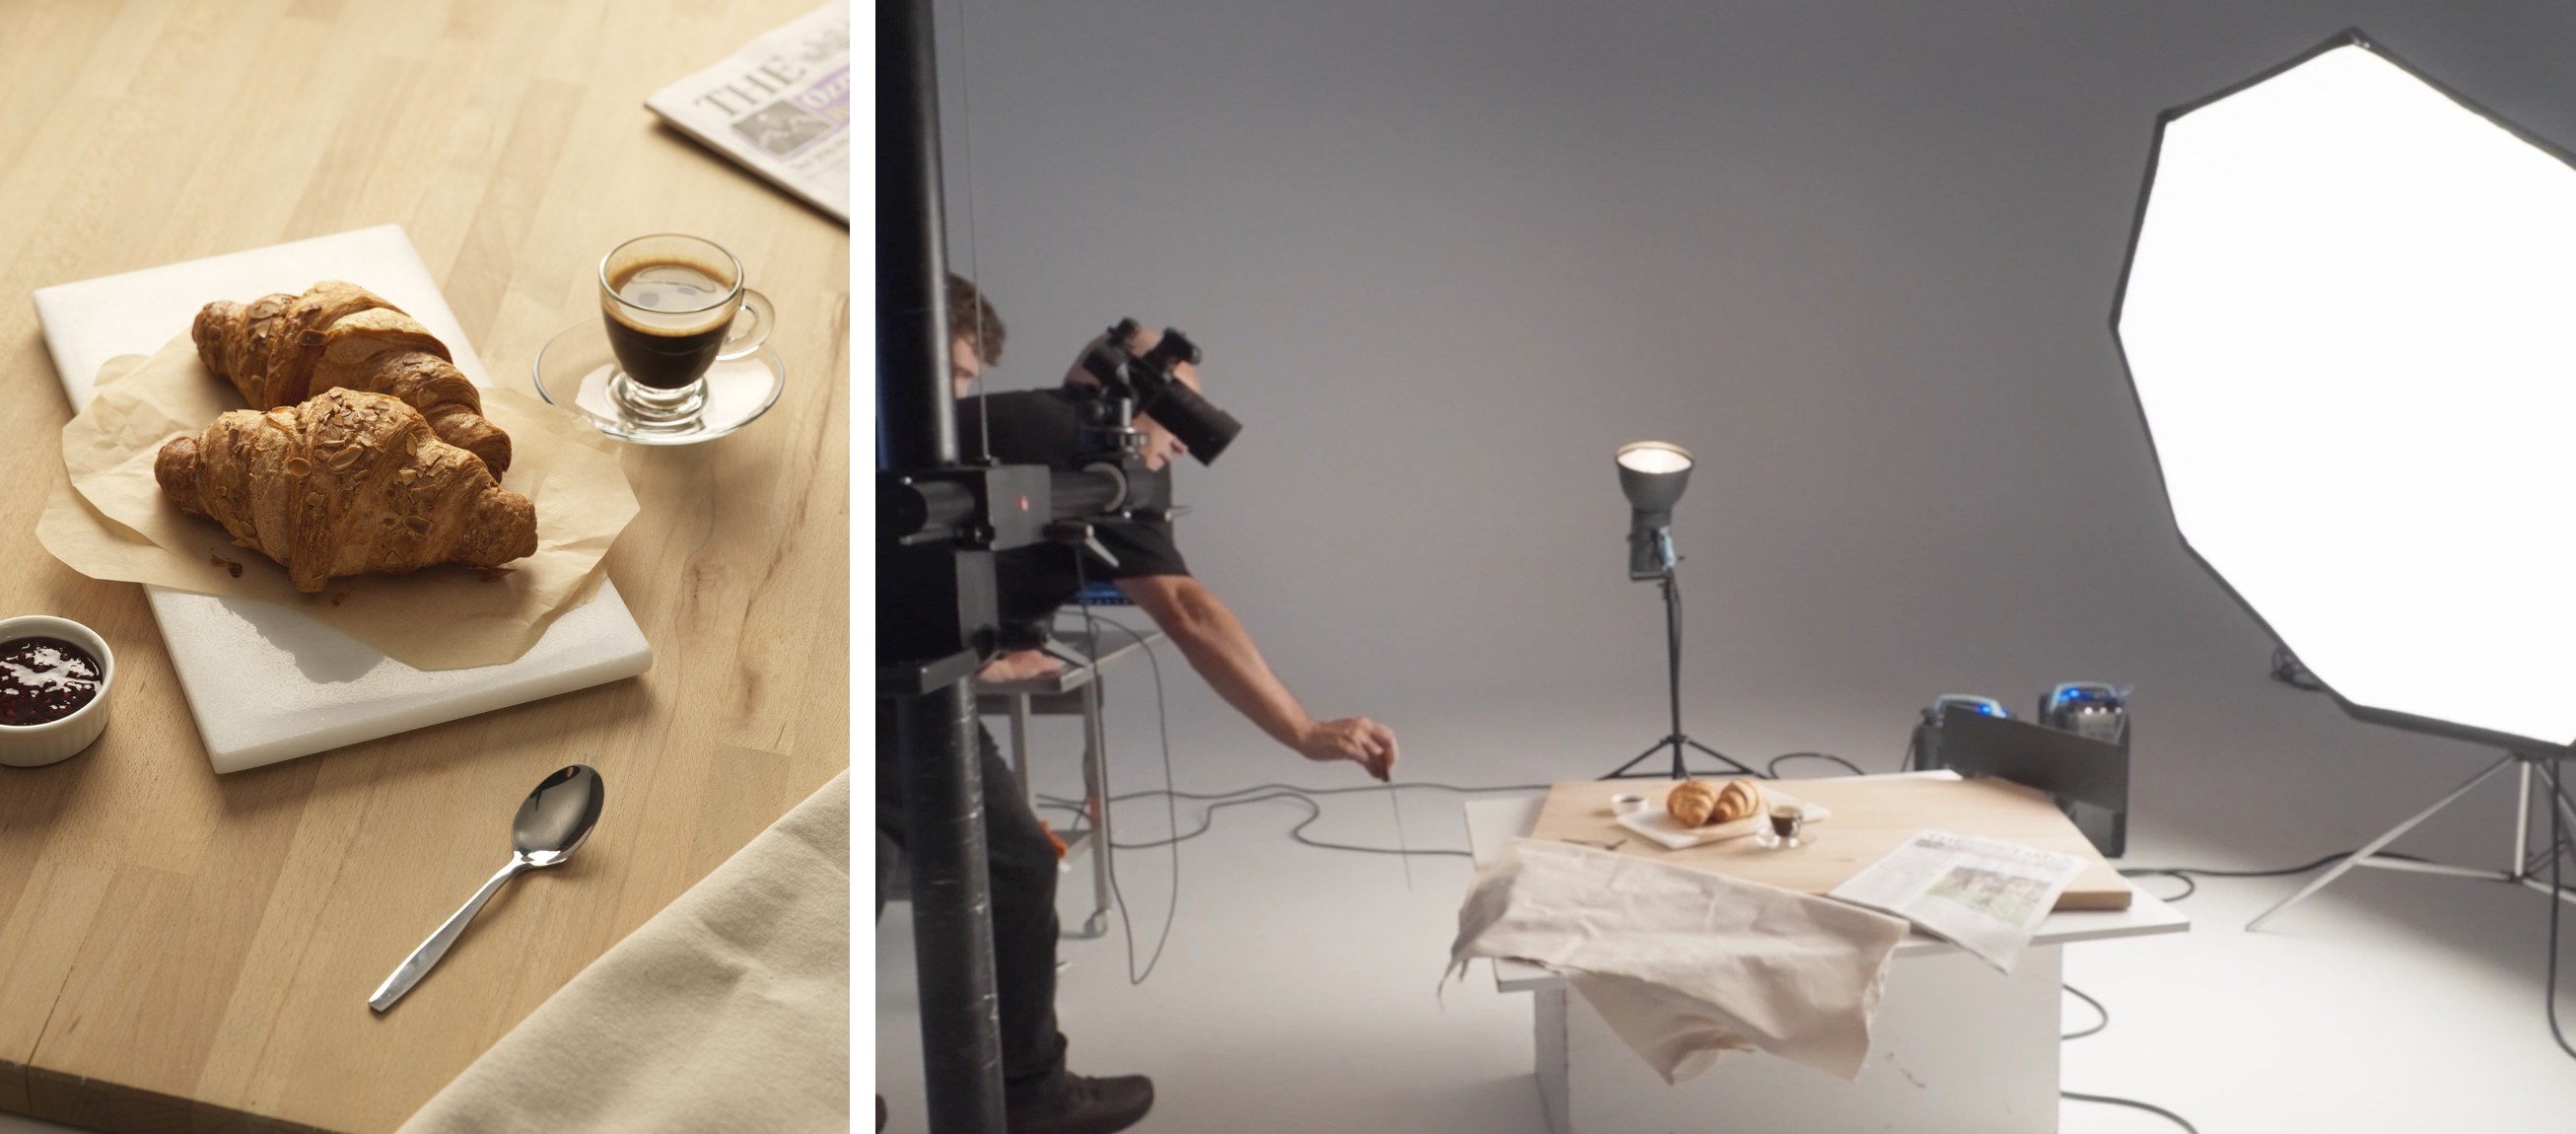
Karl places an Octabox 150 behind the scene, with a soft overhead fill so the shadows don’t block up. Two small refinements finish it:
- A flag at the back. Backlit tables get brighter towards the rear. A small black panel shades that area and pulls the back of the table down ever so slightly.
- A mirror at the front. It bounces light into the croissants. Because the source is soft, the bounce stays soft too. Swap in a make-up mirror and the fill gets a little harder, because it focuses the light back in.
Watch the reflections: the glass and the jam now carry a broad highlight – a reflected image of the softbox. You can warm up the colour temperature for that early-morning feel.
Karl’s verdict: clean and simple, but flat. “It represents more of a sort of cloudy day look.” Soft light alone reads as overcast, not as sunrise.
Setup 2: Mixing in hard light – Picolite with Fresnel spot attachment
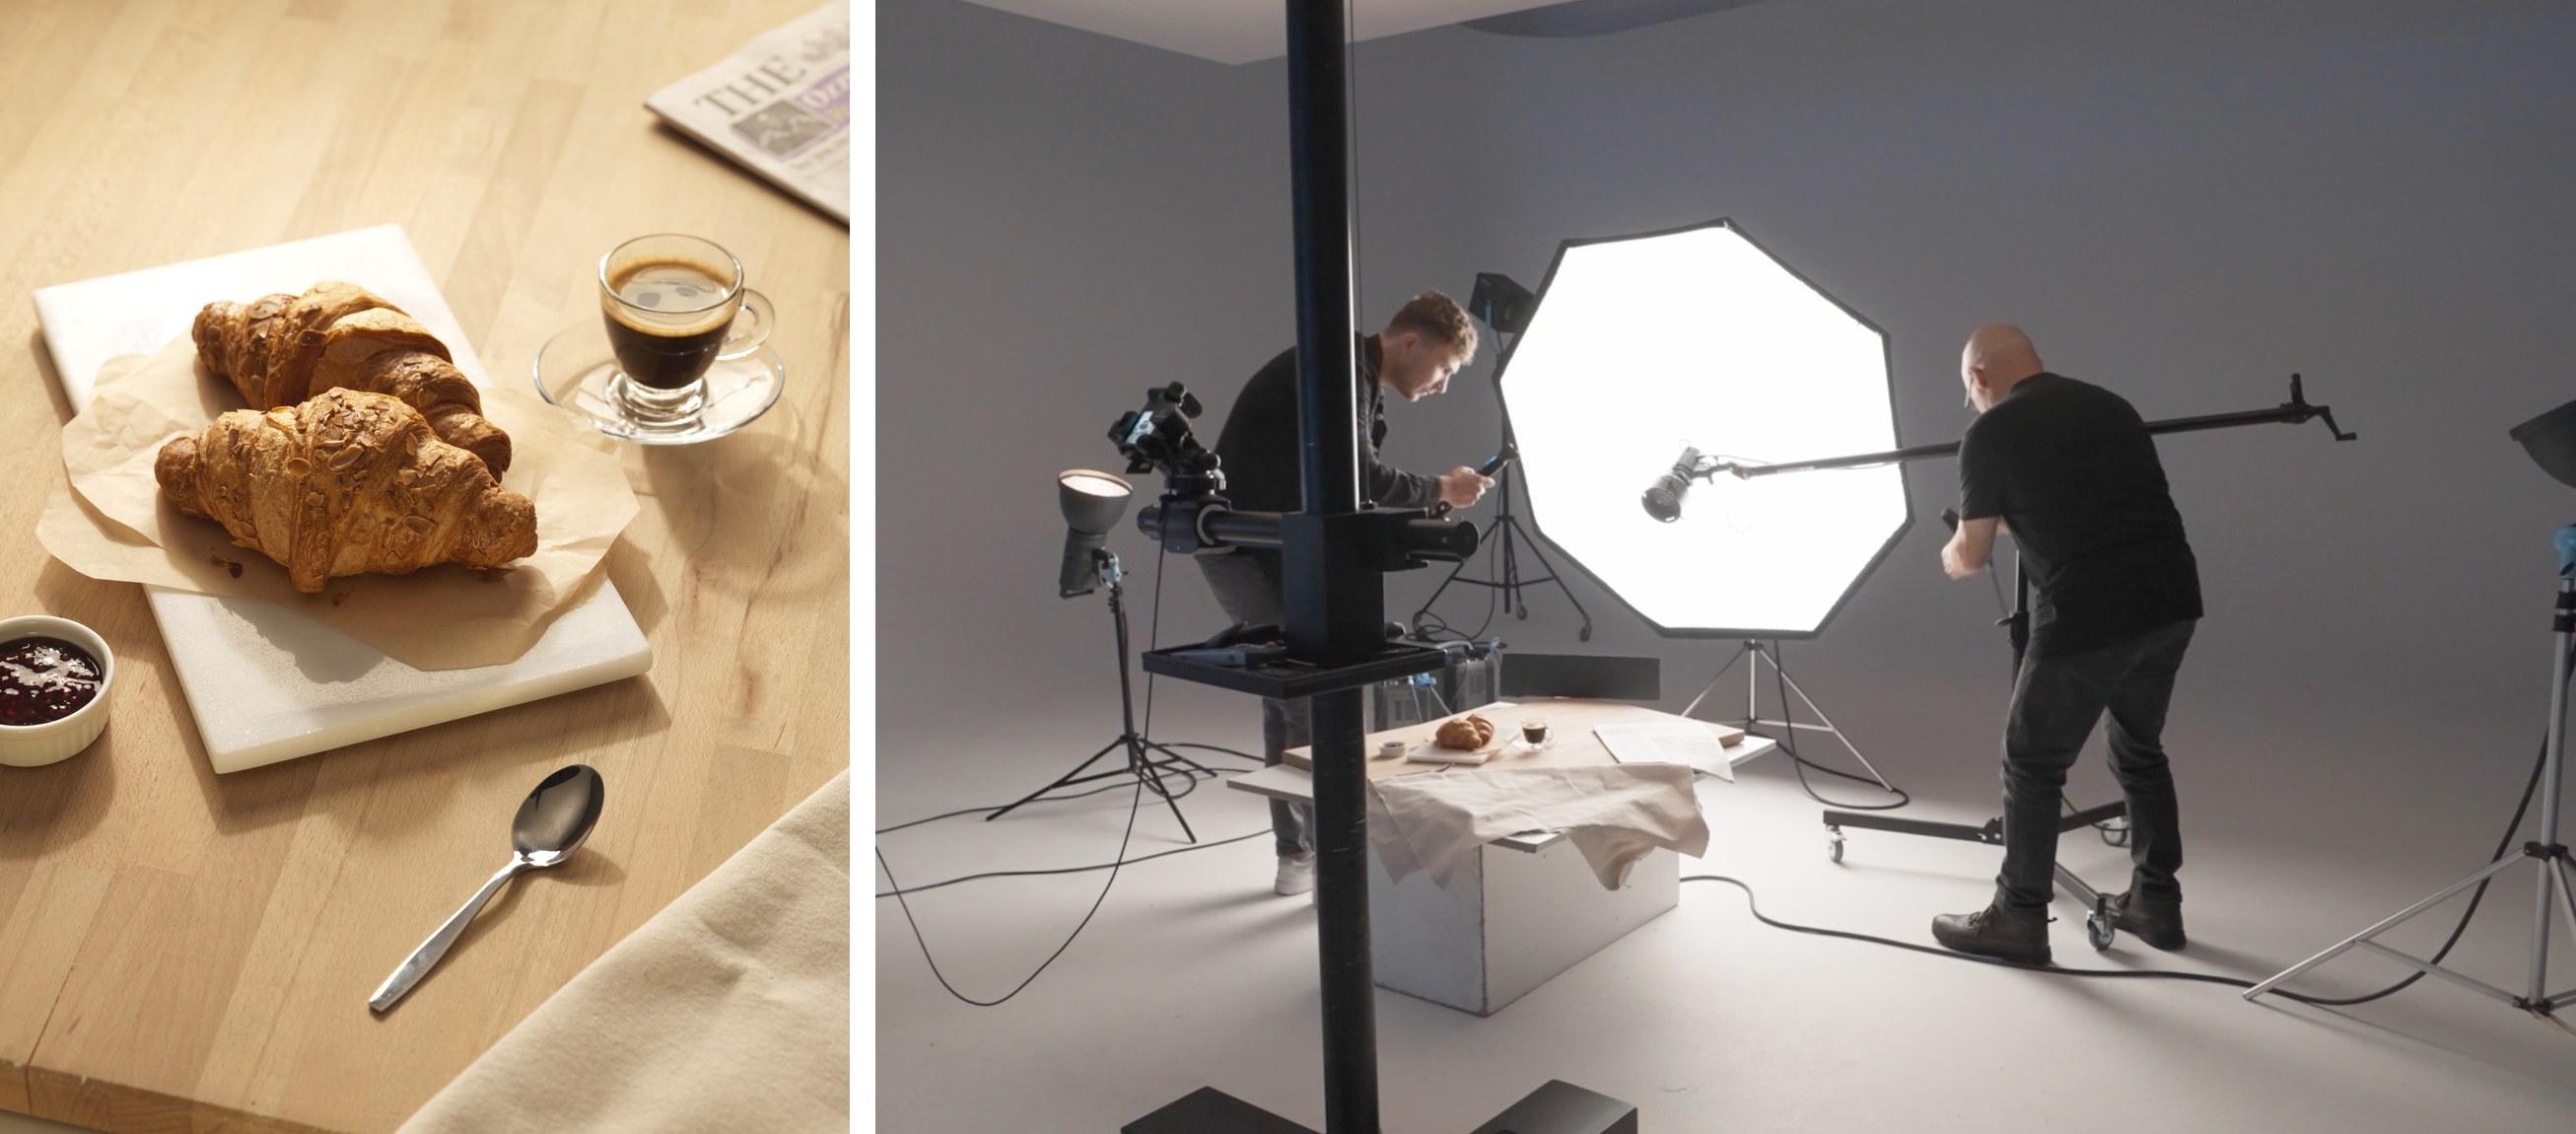
Here is the trick Karl recommends to anyone who mainly works with softboxes: mix soft light with a little hard light. He adds a Picolite with the Fresnel spot attachment on a boom, in front of the Octabox.
The Picolite is a small, flat-fronted, round flash head – compact enough to get in close to a product. The Fresnel focuses a beam whose angle you can zoom wider or tighter, so you decide exactly where the hard light lands.
Karl keeps it in the same direction as the soft key and aims it only at the croissants. The goal: a little sparkle on the pastry, crisper shadows, and as little spill as possible on the table behind. The mirror goes back in for front fill.
Karl’s verdict: one small hard light “gives us that sunlight feel back again” and looks natural. What it can’t do is project shapes, so window lines and shadow patterns are off the table.
Setup 3: One light instead of two – the Para 88
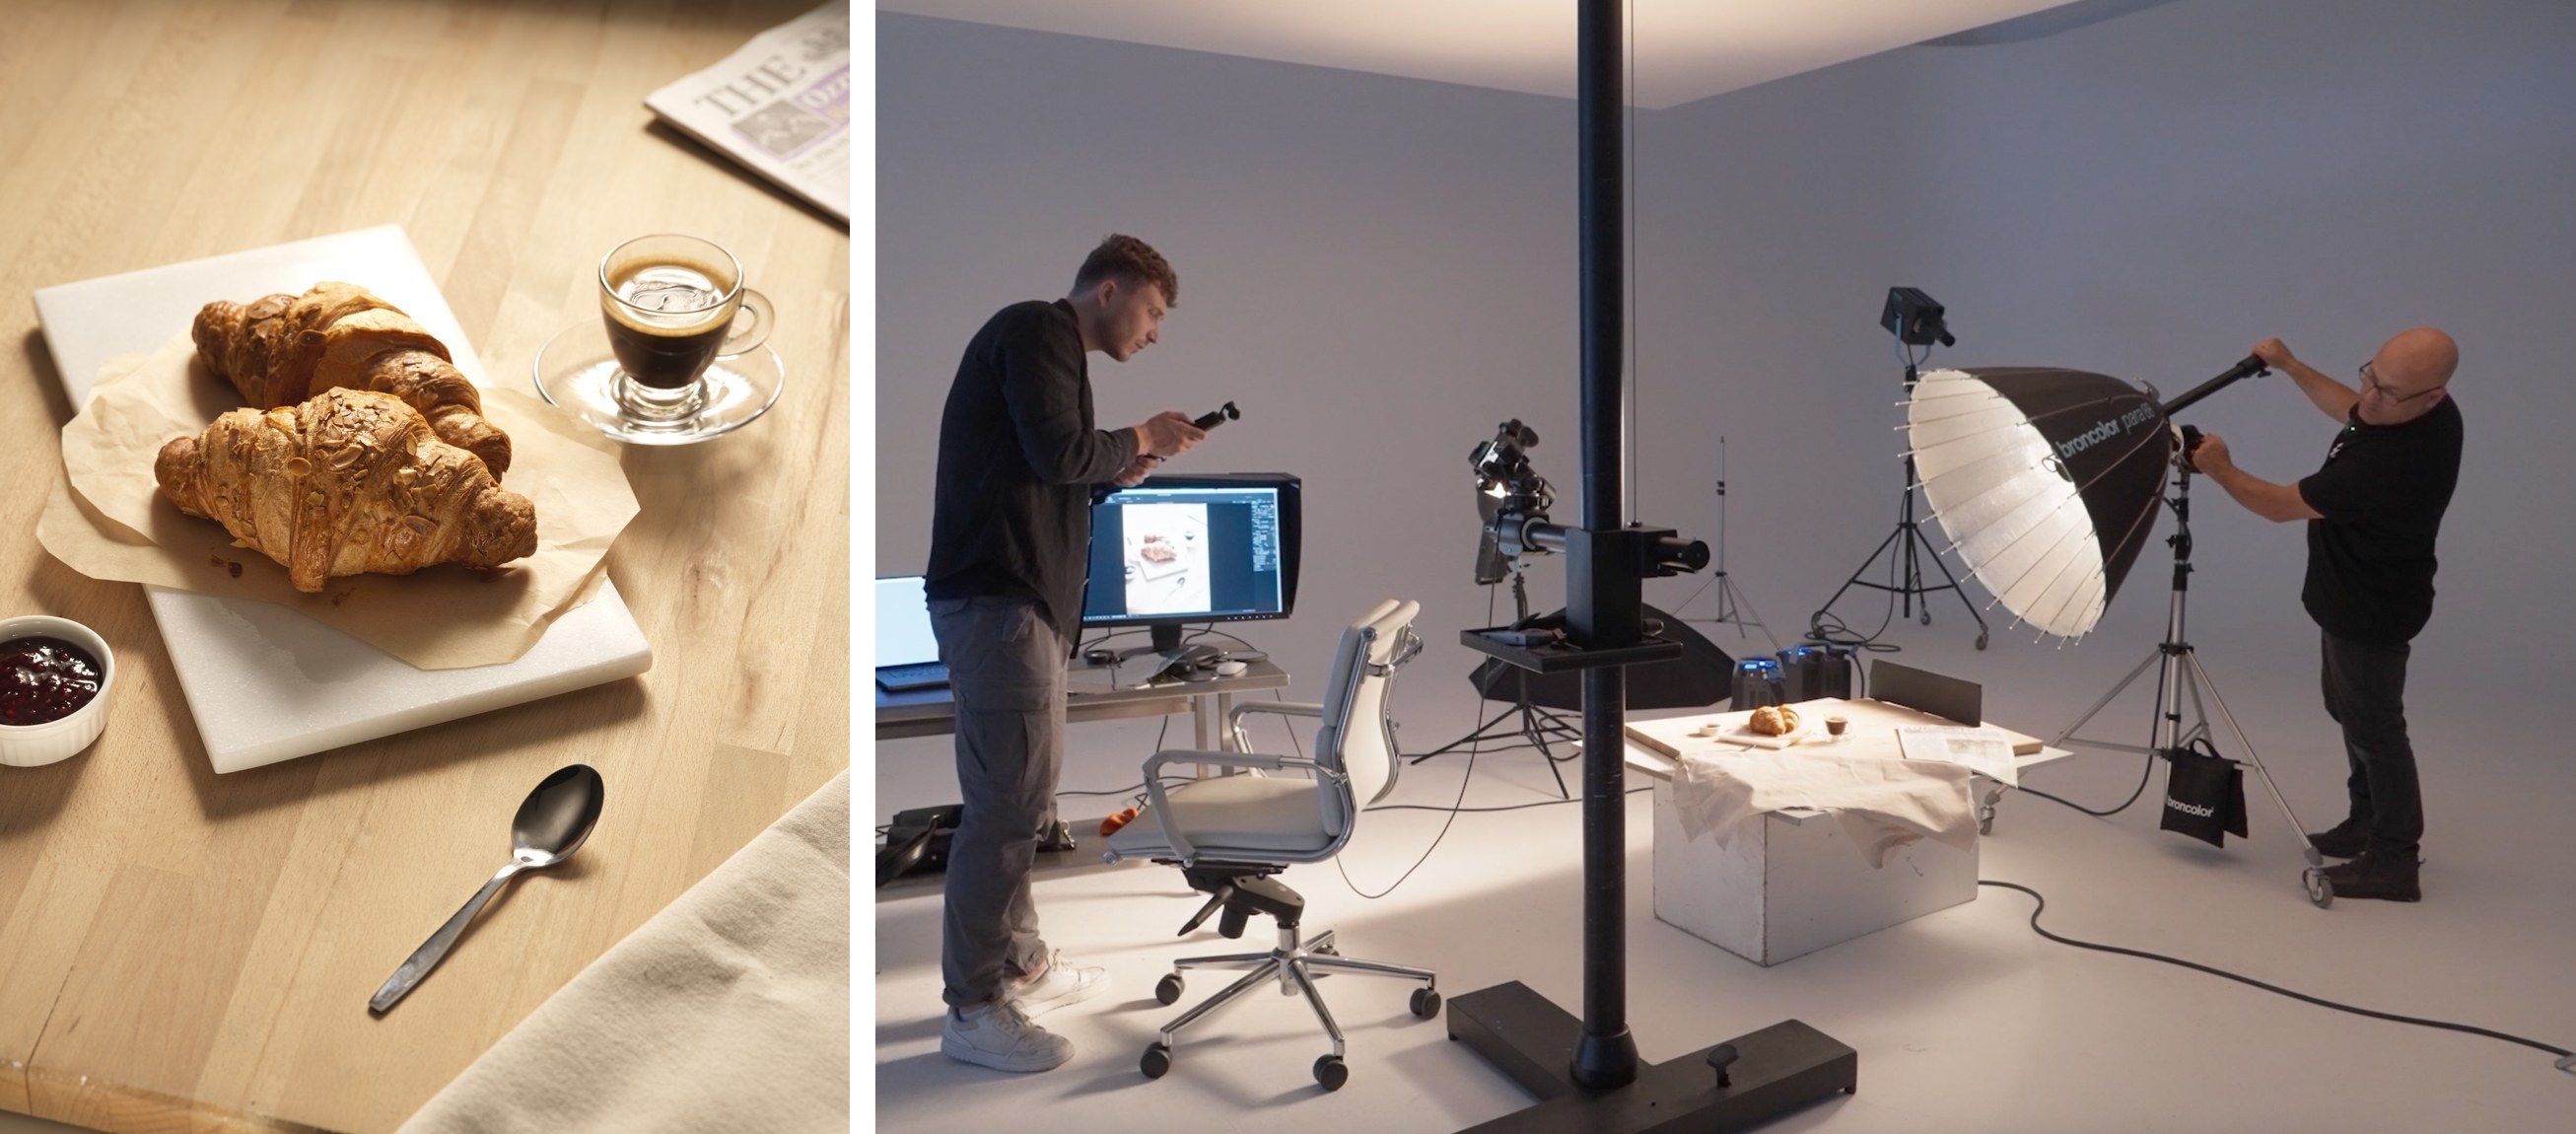
For the third take Karl uses a Para 88 with a single head. Move the head in and out of the parabolic reflector and the beam changes: focused for a concentrated, harder light, defocused for a softer one. Add a front diffuser and it becomes a round softbox.
“Paras are almost like several lights in one modifier,” Karl says. Here, one Para does what took two lights in Setup 2: the soft wrap and the hard sun come from a single source. The light has more sculpting and three-dimensional structure than the softbox alone could ever give.
A practical note: the more you focus a Para, the more light hits the subject, so the power comes down as the beam tightens. Where the Octabox needed a power setting of around 5 to 6, the Para 88 got there at 2.7. A Para gets more light energy out of every joule, so you can work with less power when you need to.
Karl’s verdict: a realistic daylight mix of soft and hard – with one light rather than two.
The one Karl would choose: sunlight through a window
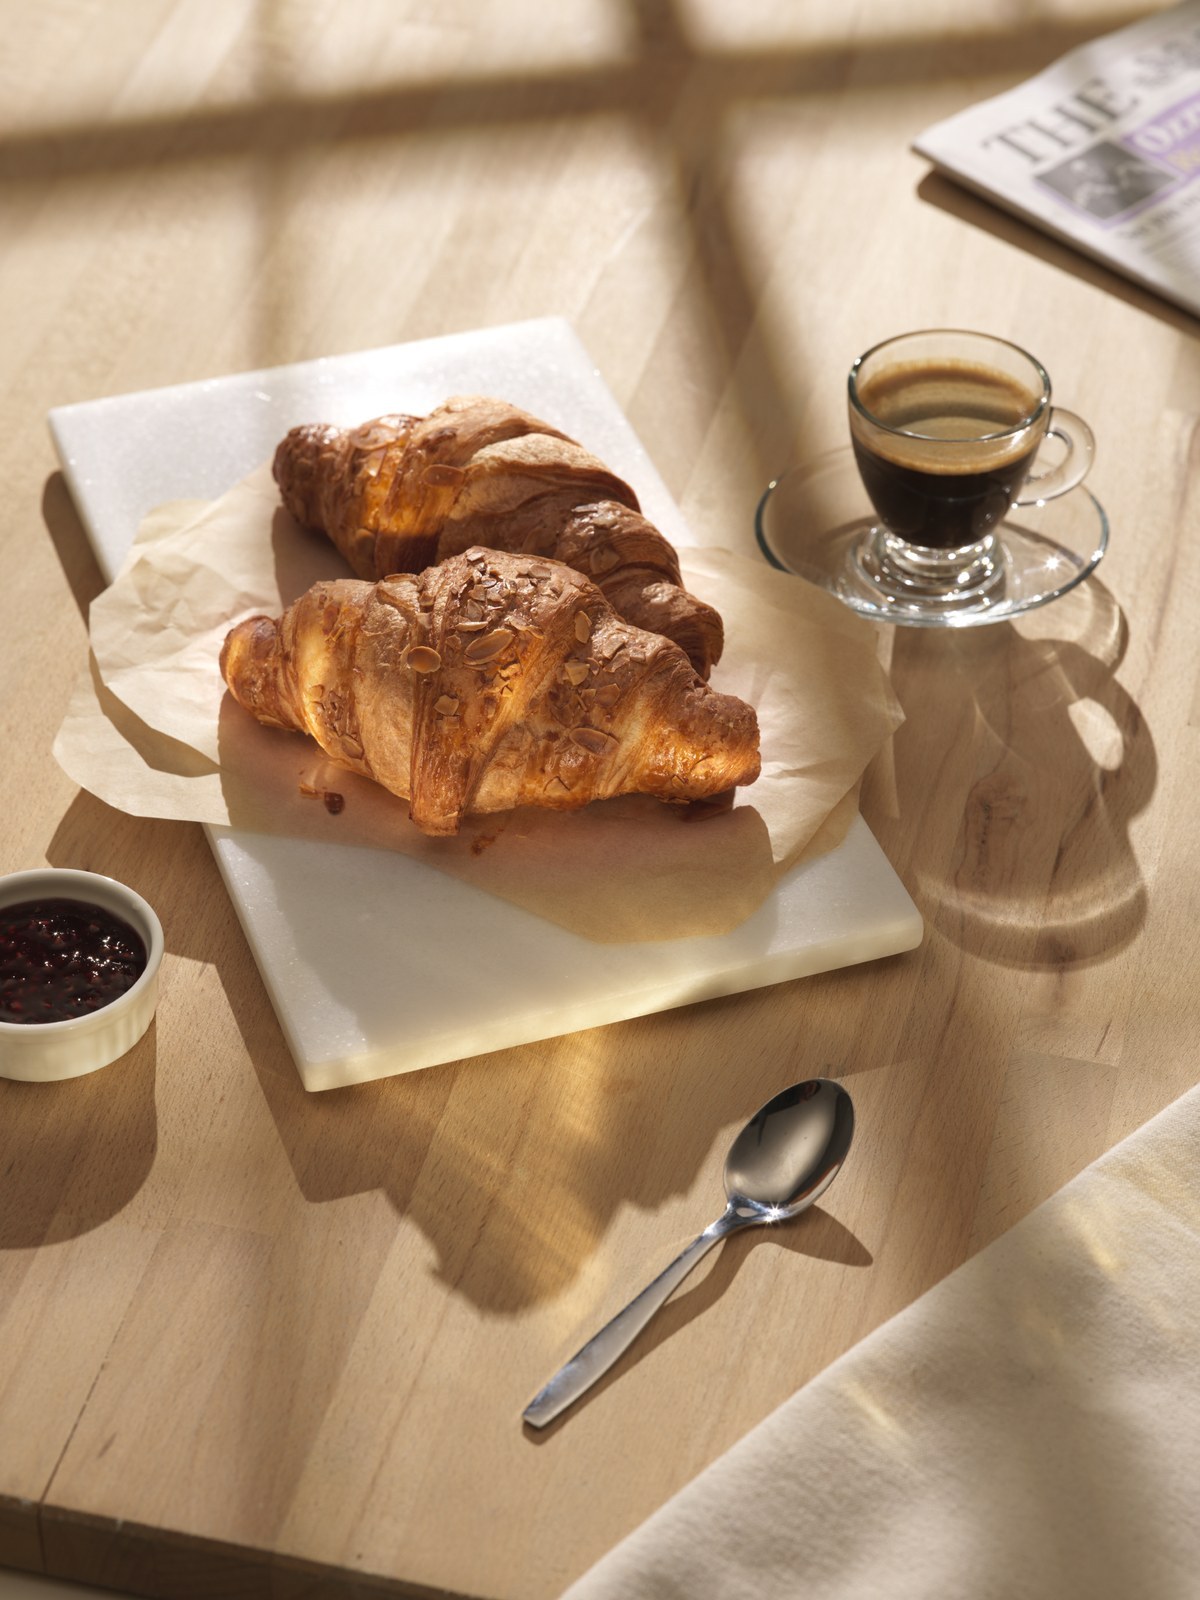
After three good options, Karl’s own pick is a fourth: a projection spot. Shooting this from scratch, he would use the Pulso Spot 4.
A projection spot does what no softbox, Fresnel or Para can: it throws a sharp, shaped pattern. With a window gobo, the bars and panes of a frame fall across the table, at whatever warmth you set. Look at the diagonal window shadows – they make the brain say “morning” before it even registers the coffee.
“That simulation of sunlight coming through a window just adds a sense of realism to the shot,” Karl says.
Editor’s note: the Pulso Spot 4 is no longer part of the broncolor range. Today the same job is done by the Spot attachment, which mounts on a Pulso G or Unilite and projects fine lines, graphic patterns, gobos and slides. On smaller sets, the Projection attachment for Picolite does it in a compact package, with an edge you can focus sharp or throw soft.
Three setups at a glance
- Octabox 150 behind, flag + mirror: soft, even, slightly flat – an overcast look.
- Octabox 150 + Picolite with Fresnel: soft wrap with a hard accent – adds “sun” to a softbox setup.
- Para 88, one head: a sculpted mix of soft and hard – natural sun from a single light.
- Projection spot with window gobo: hard window light and shadow pattern – maximum realism.
What to take into your next food shoot
- Backlight first. Light from behind reveals texture, gloss and the edges of glass.
- Soft alone reads as cloudy. Morning sun needs at least some hard, directional light.
- Control the falloff. A small flag at the back keeps the table from getting brighter than the hero.
- Mirrors are cheap fill. A flat mirror keeps the fill soft; a make-up mirror makes it harder.
- Watch the reflections. Glass and jam reflect your light source, so its shape becomes part of the picture.
- Shape tells the story. A window pattern says “morning” more clearly than any colour temperature.
Learn it from Karl Taylor
Karl Taylor is a professional photographer with more than 25 years of experience shooting for global brands, and co-founder and CEO of Visual Education. The platform offers more than 1,000 classes on lighting, product, portrait, fashion and post-production, plus live shoots and workshops, for a community of over 40,000 students.
Want to watch Karl build scenes like this step by step? Explore the food photography courses on Visual Education and see how he uses specialist studio lighting such as spots, Fresnels and projections.


