During the FESTIVAL DE CANNES 2019, the producer AWAMU MOJA (Luxemburg) teamed up four top photographers with four international fashion designers. He invited them to experiment with photography for one day in their “MOJA photoLAB”. The task for the four teams was to create cinematographic photography.
In LAB 2, Urs Recher from Switzerland met fashion designer Danilo Forestieri from Milan, Italy. Instead of reproducing famous looks of even more famous movie scenes, Urs chose a more technical approach to the theme.
Here are some of Urs’s experiences and concept ideas for the photoshoot:
First, some important information about exposure times:
Most of the time, standard movie scenes use 25 frames per second. The exposure time for every single frame of this sequence is somewhere around 1/25 s. This is much longer than exposure times normally used when taking photographs with flash. For that reason, if you look at most single frames of a movie, you will find some unsharpness due to motion-blur.
Shooting #1
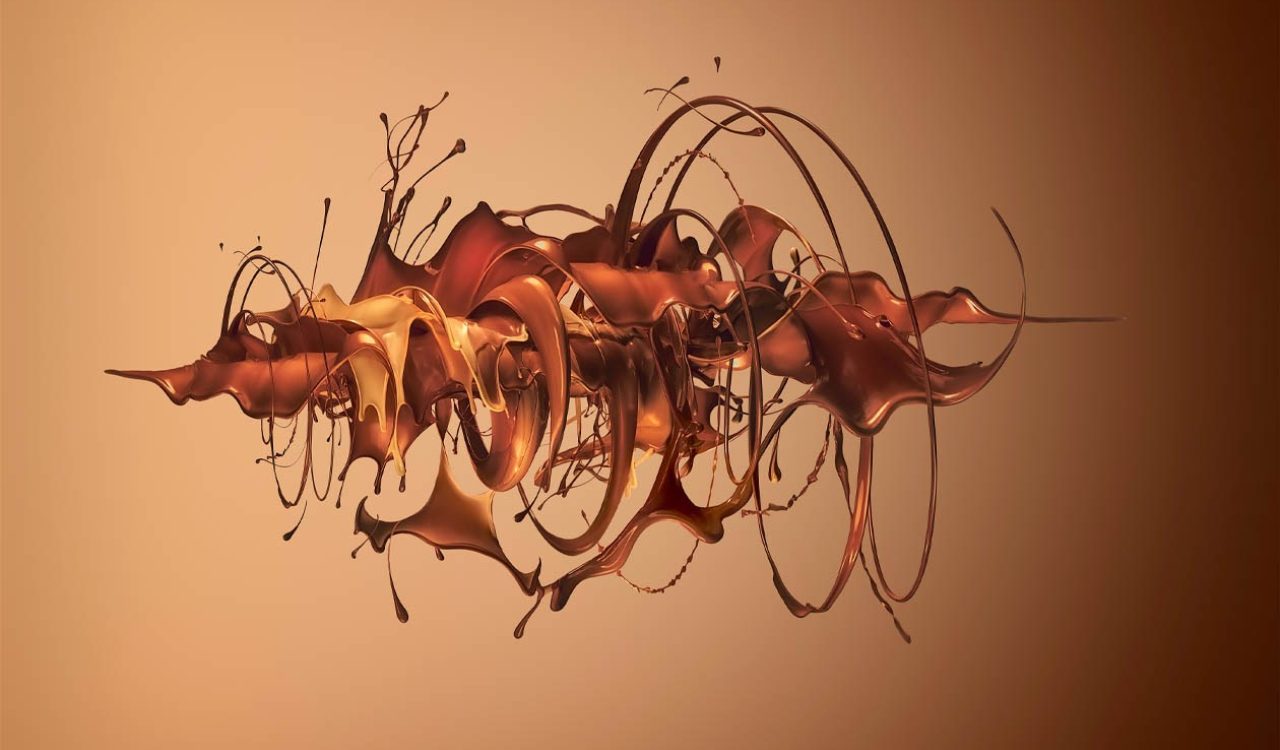
My concept for the final images of the first shoot was to combine motion-blur, as we know it from movies, with super sharp elements of photography.
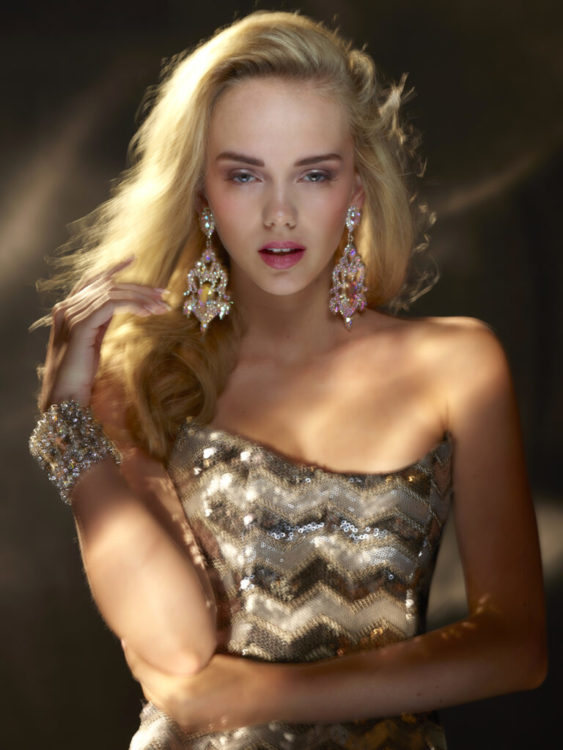
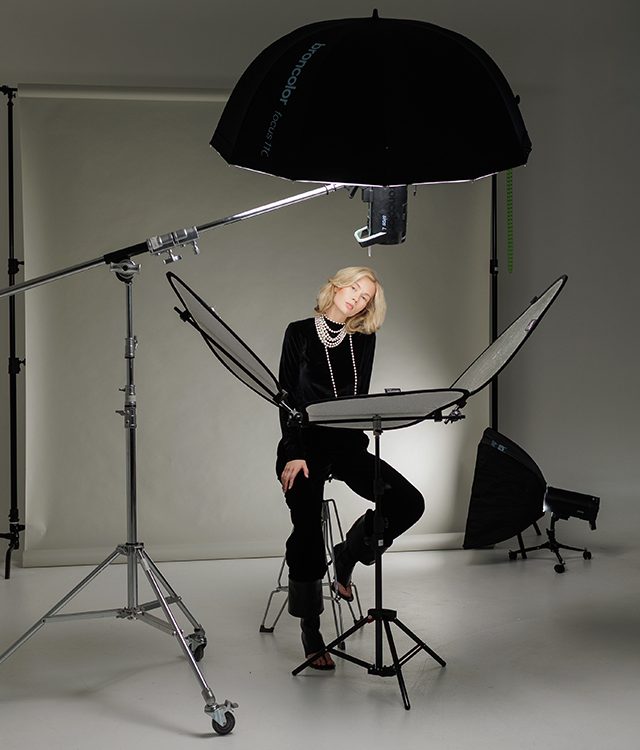
To achieve this, I used a broncolor HMI F 400 with an open face reflector as the main light. As we were using a medium format camera, the high light output enabled us to close the aperture on the camera to f/8.
I placed this strong continuous light on the left behind the model (you can see it in the picture below exposing the model’s hair). In order to make this light hit the model’s front, even though it was directed from the background, three assistants needed to hold mirrors and reflect the light back. I asked my assistants to constantly change the shape of these plastic mirrors in order to get different light patterns every time I exposed another picture.

As the shutter speed, I chose 1/8 s. This is about three times longer than the 1/25 s that I mentioned earlier. Nevertheless, I needed this to achieve the motion-blur properly. In order to have higher control over this effect, I constantly shook the camera rather than asking the model to move. In this way, the model could focus on posing.
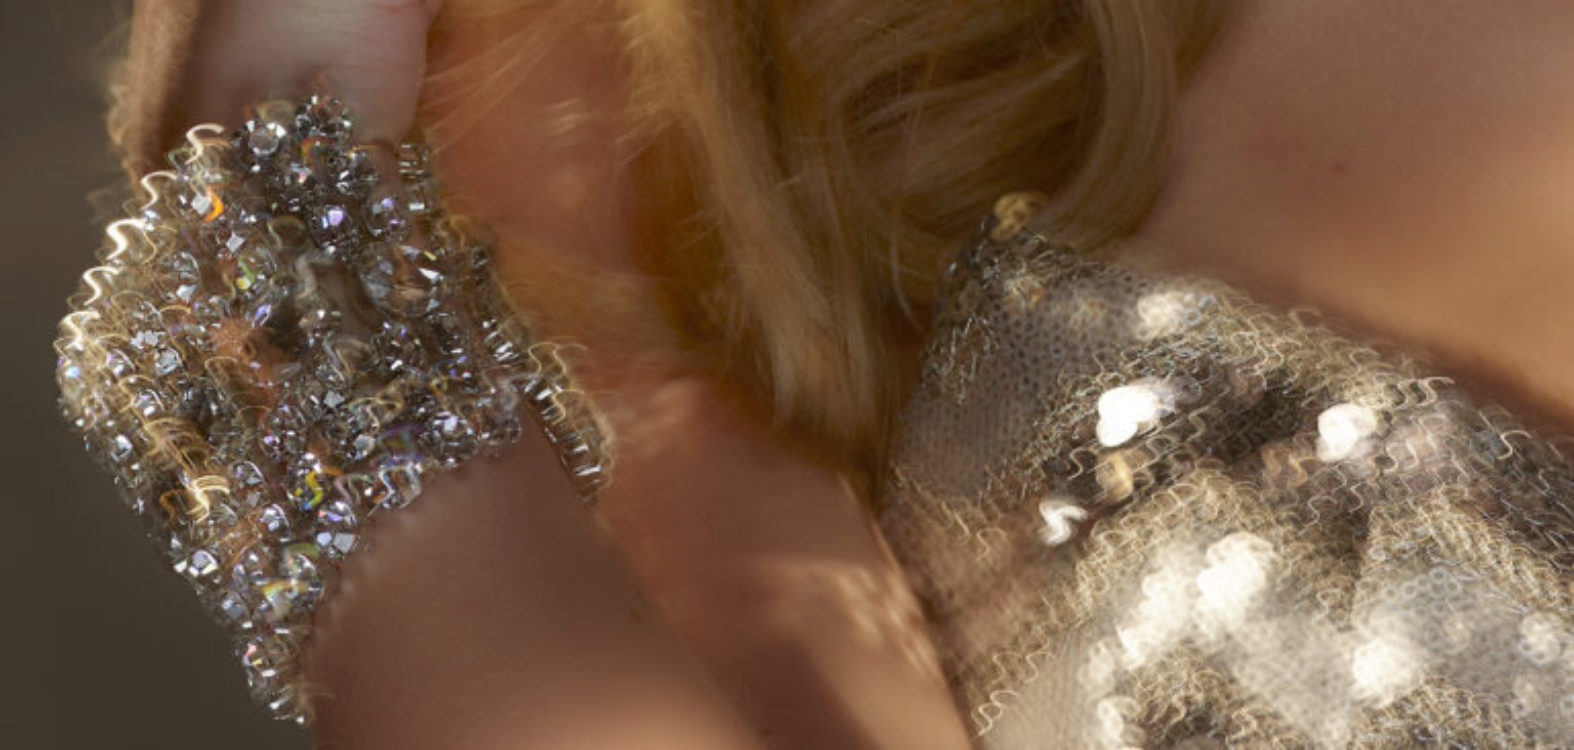
The following close-up of the bracelet and parts of the dress perfectly show the motion-blur effect I was looking for.
A few words on the continuous lights: To achieve this look, both the LED F160 and the HMI F 400 can be used. However, they do have different advantages:
The color temperature of the broncolor LED F160 can be adjusted precisely over a wide range (from 2800 K to 6800 K). HMI, on the other hand, is more powerful, but its color temperature is fix daylight-balanced.
For this shoot, I was using a medium format camera. Thus, I chose the HMI because the extra power allowed me to close the aperture to a reasonable f/8. As I still wanted the continuous backlight to be very warm in tone, I used a conversion filter that shifted the color temperature from daylight (5500 K) to Tungsten (3400K).
After everything worked well with the HMI light, I took care of the flash:
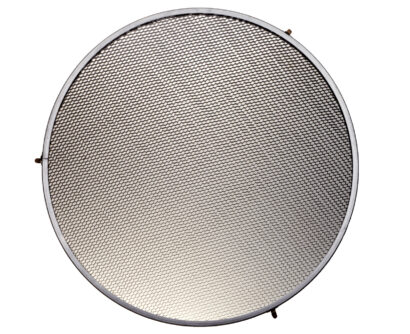
Here, I went for a classic beauty set up – two soft light in the butterfly position (a beauty reflector and a small softbox). Putting grids on both light shapers was essential. Only like this, I could keep the flashlight away from the rest of the model’s body and only illuminate her face.
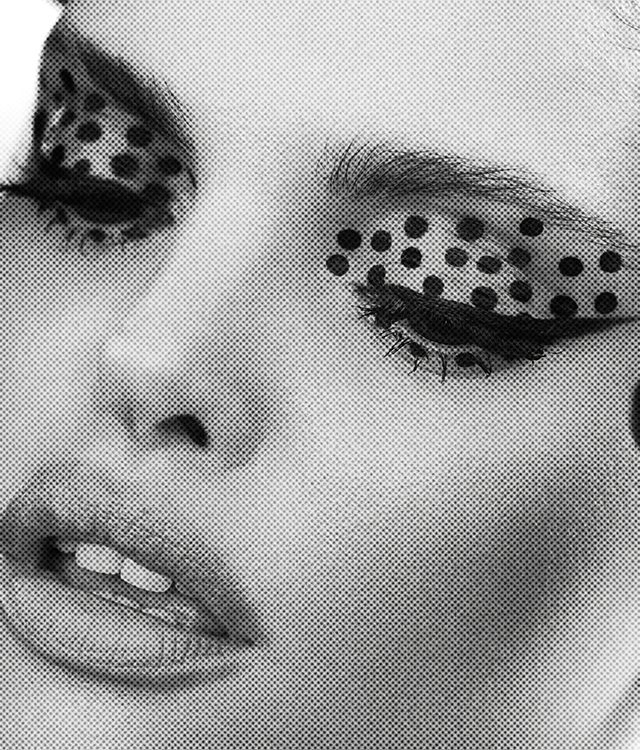
This second close up shows the uncompromised sharpness of the eyes and face area. I attached both soft lights to a Scoro 3200 S power pack. Its super short flash durations guaranteed absolute sharpness, no matter how fast I moved the camera!

Shooting #2
For the second shooting of the day, my concept was to bring several frames of a movie sequence into one single photograph. Therefore, I first installed a classic fashion light, a broncolor Flooter. This large Fresnel spot is the perfect choice for a glamorous and classic movie light.
However, I didn’t want to work “just” with a stroboscopic effect and expose the same light several times, as this technique produces many overlapping and unclear photographs. Instead, I wanted to frame the main exposure by contours of the same pose.
I placed large softboxes on both sides behind the model and set them to rather low power. All three lights (the two contours and the main light) were firing at different moments. I programmed precise delays in the Scoro power packs as follows: The softbox on the left had no delay and was firing immediately when I started the exposure. The Flooter was delayed by 1/10s. The contour light on the right was exposed with a delay of 2/10 s (or 1/5 s).
My camera shutter speed was long enough (1/5 s) to capture all three flashes. As I slowly rotated the camera during this rather long shutter opening, the three exposures hit different areas of the sensor. I used the speed of this rotation to position the main exposure right in the shadow areas of the contour lights. Like this, I was able to avoid overlapping the three exposures and get the clear shot I wanted: Three frames of a movie sequence squeezed into one single fashion photo.

Shooting #3
My third set up followed a quite similar concept. The main light again was a broncolor Flooter (simply a great light!) – this time with an additional strip lite shaped softbox (30x180cm) as a back light from the left.
Again, I wanted to work with multiple exposures and therefore “copied” the Flooter with a picolite and Fresnel spot attachment. By focusing the Fresnel spot attachment, I kept the light more on the model’s upper body, while the legs show a clear fall off. Generally, the power setting of the picolite was much lower than the main lights.
I attached the background light (a P70 standard reflector with a 5:1 grid in vertical position which was equipped with a red gel filter) to the same Scoro 3200 S power pack as the picolite. As I delayed this pack slightly, they were exposed somewhat later than the main lights (Flooter and strip lite). This explains why the main exposure appears slightly transparent and the model’s skin reddish in the shadows.

Shooting #4
On my last beauty shot, I used a broncolor HMI F 400 continuous light again, but this time on the background only, without hitting the model directly.
The main light had a 60×100 cm softbox attached and was positioned at an angle that concentrated the light in the center of the face while both sides appeared much darker.
Like in all other shots of this day, I moved the camera during a relatively long shutter speed. In this specific example, the camera was rotating to the left. Therefore, the face of the model moved to the right on the sensor. This explains the shadow contours on the right side as well as the transparent areas on the left.
It was again the short flash duration of a Scoro 3200 S power pack that guaranteed the absolute sharpness – even when I constantly moved and shook the camera!

In general, I recommend using combinations of continuous light and flash. Yes, it sometimes makes you think a little harder and longer as the shutter speed of your camera plays an important role in your shooting (When using flash only, most of the time the aperture is the only number, we are interested in). However, once you get used to this, it offers you great and almost unlimited creative possibilities. Try it!
MOJA photoLAB 2 / Cannes 2019:
production: www.awamumoja.com/
photography: www.ursrecher.ch
fashion design: www.instagram.com/daniloforestieri/
hair / make-up: www.valentinabecker.com/
model: www.instagram.com/lola.alc/
check out the other LABs:
LAB 1: Sails Chong (photography, China) meets Huiquin Peng (fashion, China)
LAB 3: Tengku Azri (photography, Malaysia) meets Ambra Zavatta (fashion, Italy/USA)
The teams also enjoyed great support from Paddy McGurgan (make-up, Ireland).