With the “Famous Five”, we have a complete tool to analyze light. When you see a photograph or when you have a certain light mood in mind, you can easily figure out which light shaper you should use to get the desired effect.
1. Coverage
The coverage of a light shaper tells us how the light is distributed, it can be:
- Even (e.g. big softbox behind the camera, open reflectors defocused, Para defocused, optical snoots)
- Center-weighted (e.g. open reflector focused, Para focused, Reflector Par, some Fresnel spots, any light shaper with honeycomb grids)
- Linear graduated: (e.g. long and narrow softboxes at a short distance, striplites, and lightbars as sidelights)
The coverage of a Par reflector (here I used three of them) is clearly center-weighted.
2. Edge transfer
The edge transfer gives us an idea, how abrupt the light ends, once we reach the end of the light angle.
It can be:
- Very sharp (e.g. optical snoots and attachments)
- Quite sharp (Fresnel spots, honeycomb grids)
- Soft (e.g. Softboxes, Paras, umbrellas, open reflectors)
- Non-existent (bare bulb, balloon, litestick without reflector and lightbar)
In this portrait, the edge transfers of small 35x60 softboxes are used to create a nice light fall-off on both sides of the model’s face.
3. Shadow definition
Shadows of hard lights are highly defined. This means, that even very small objects have their own, very clear shadow. These fine shadow details disappear with soft lights that have a lower shadow definition. Diffused lights have no shadows at all.
(Also read: https://broncolor.swiss/news/hard-soft-and-diffused-light-what-is-the-difference )
The following picture of a jumping dancer shows very detailed shadows. The light of a Pulso Sopt 4 with its 150mm projecting attachment is very hard. (… the edge transfer is extremely sharp and the coverage very even).

4. Shadow contrast
Working in a black or very large studio we can expect black shadows wherever we do not intentionally illuminate our object’s shadow side.
In smaller or brighter painted environments, however, light can be bounced back from the walls and fill in the shadows unintentionally. In this situation the shadow contrast depends directly on the light angle of our source: Directed spots or normal reflectors with honeycomb grids do not hit the walls very much resulting in black shadows. When working with the broncolor balloon we have a light angle of 360°. All the studio walls receive a lot of light and the shadows become very bright.
When we are working with such an uncontrolled “wide-angle-light”, the inverse square law still gives us a possibility to control our shadows: The closer we get (to the object or model) the faster the light falls off after hitting it. This makes the walls (and the floors and ceilings) darker, and the shadow contrast is increasing.
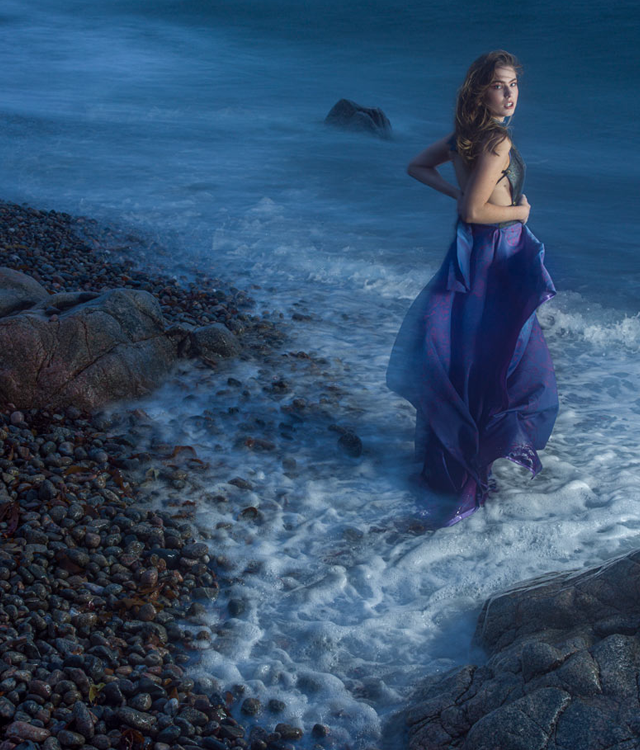
The following portrait shows clearly that shadow definition (the hardness of the light) has nothing to do with shadow contrast. The light here is extremely soft but very high in contrast resulting in a very pleasing three-dimensional and strong portrait.

5. Highlights
In general, we can say that the highlights of hard lights are very small and completely burnt. Those soft lights clearly show the form of the light shaper (rectangular or round) and might still be burnt a little. Diffuse lights finally should not show any dominant highlight anymore, but they can reduce the color saturation dramatically (e.g. the color of eyes in a diffuse portrait).
The brightness of the highlights gives you additional information about the distance from the light to the object or model. The thumb rule is: When the light shaper is further away, the highlight is brighter.
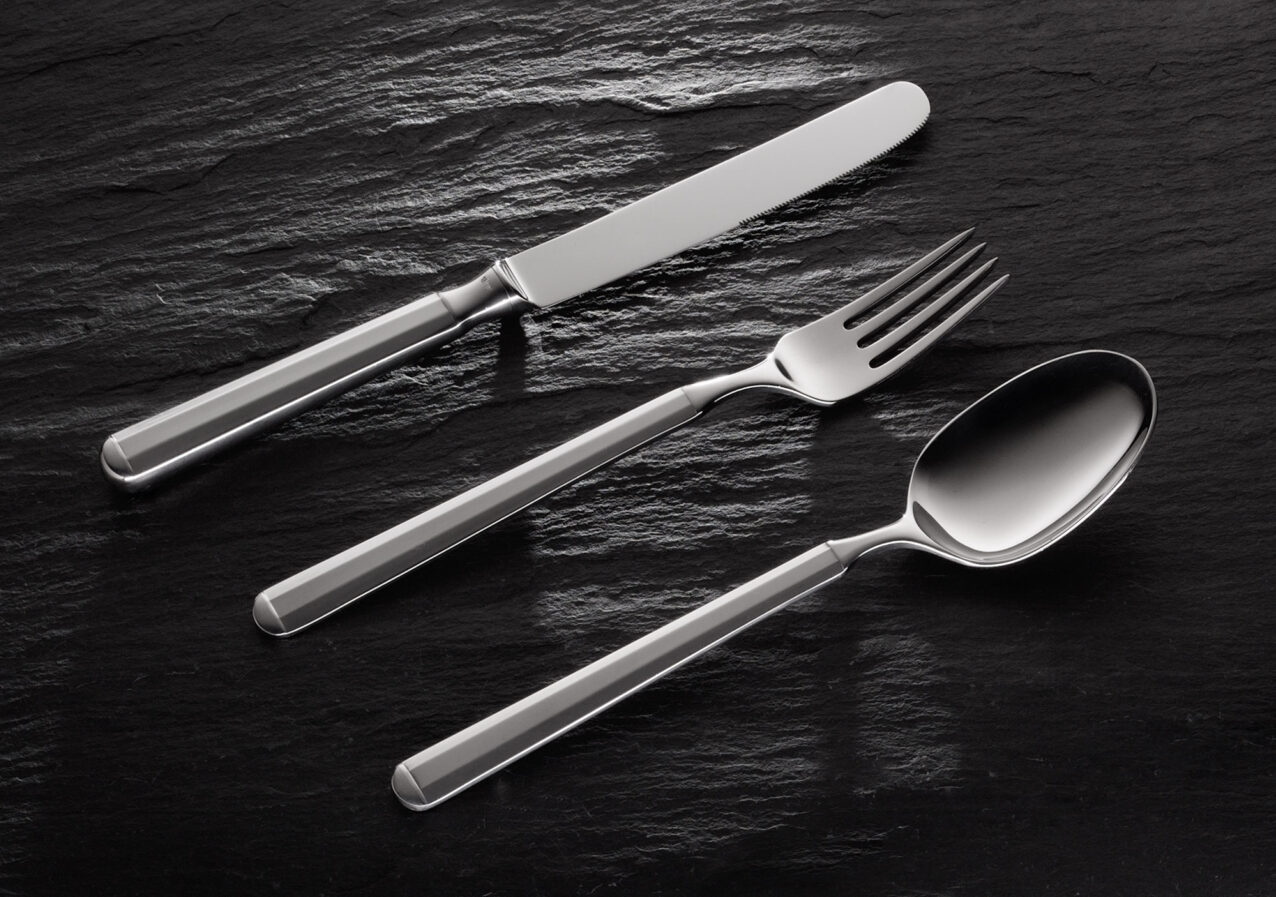
Shooting cutlery (or any shiny, polished object) is nothing else than shooting the reflections of the light source. Here, this light source is an acrylic diffuser with a standard reflector P70 with honeycomb grids behind it. The narrow white line is made with a Striplite 60.