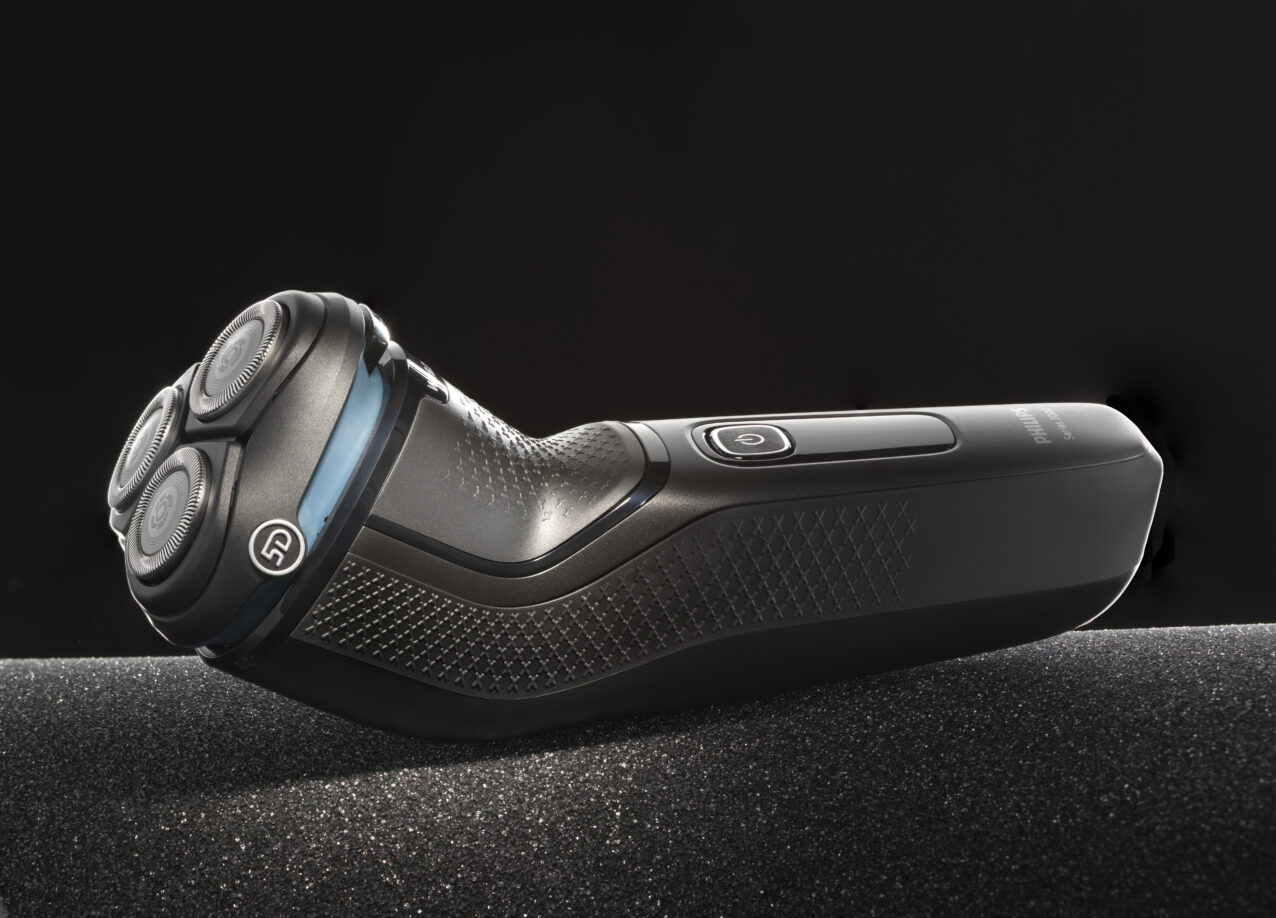
When photographing an electrical appliance with complex shapes, many edges and corners, it is easy to get lost in terms of lighting. I want to show here how a clever set and "recycling" of light can create an appealing shot of such a product with only two lamps.
The basic lighting concept consisted of a relatively large Softbox (compared to the small object) with side lengths of 90 and 120 cm (1). Directly on the front diffuser I attached a deep black background (2). This was large enough to cover the whole picture, but much smaller than the Softbox, which could therefore dominantly illuminate the contours around the object.
I positioned a white acrylic plate (3) in front of the Softbox in such a way that on the one hand it created the gradation in the glossy area around the on/off switch and at the same time somewhat reduced the contour light coming from above (otherwise the brand name becomes illegible). A grey filter positioned to the right behind the subject served the same purpose.
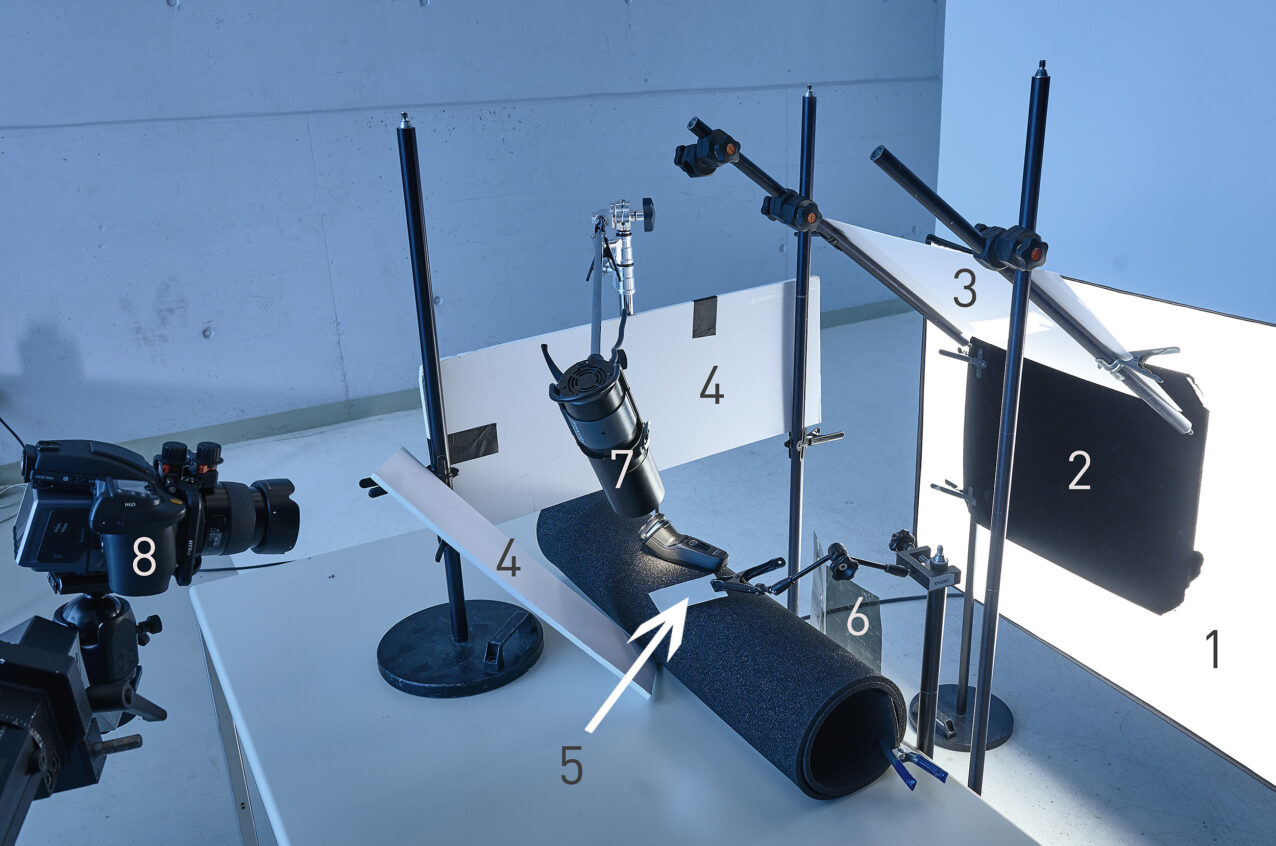
The light from the Softbox was reflected by two white cardboards (4) onto the warping blades and by a small mirror (5) onto the lower part of the handle.
Finally, only a small additional light was needed; a Picolite with a narrow honeycomb grid and an aperture mask illuminated the razor from a steep angle from the top right, emphasising its shapes and structures very nicely.
Photographs were taken with a medium format camera and an 80 mm lens on a tilt/shift adapter (which extended the focal length to about 120 mm). Nevertheless, for optimal sharpness, 6 shots with different focus had to be taken (at aperture 16) and stitched together.